

WeShip United States


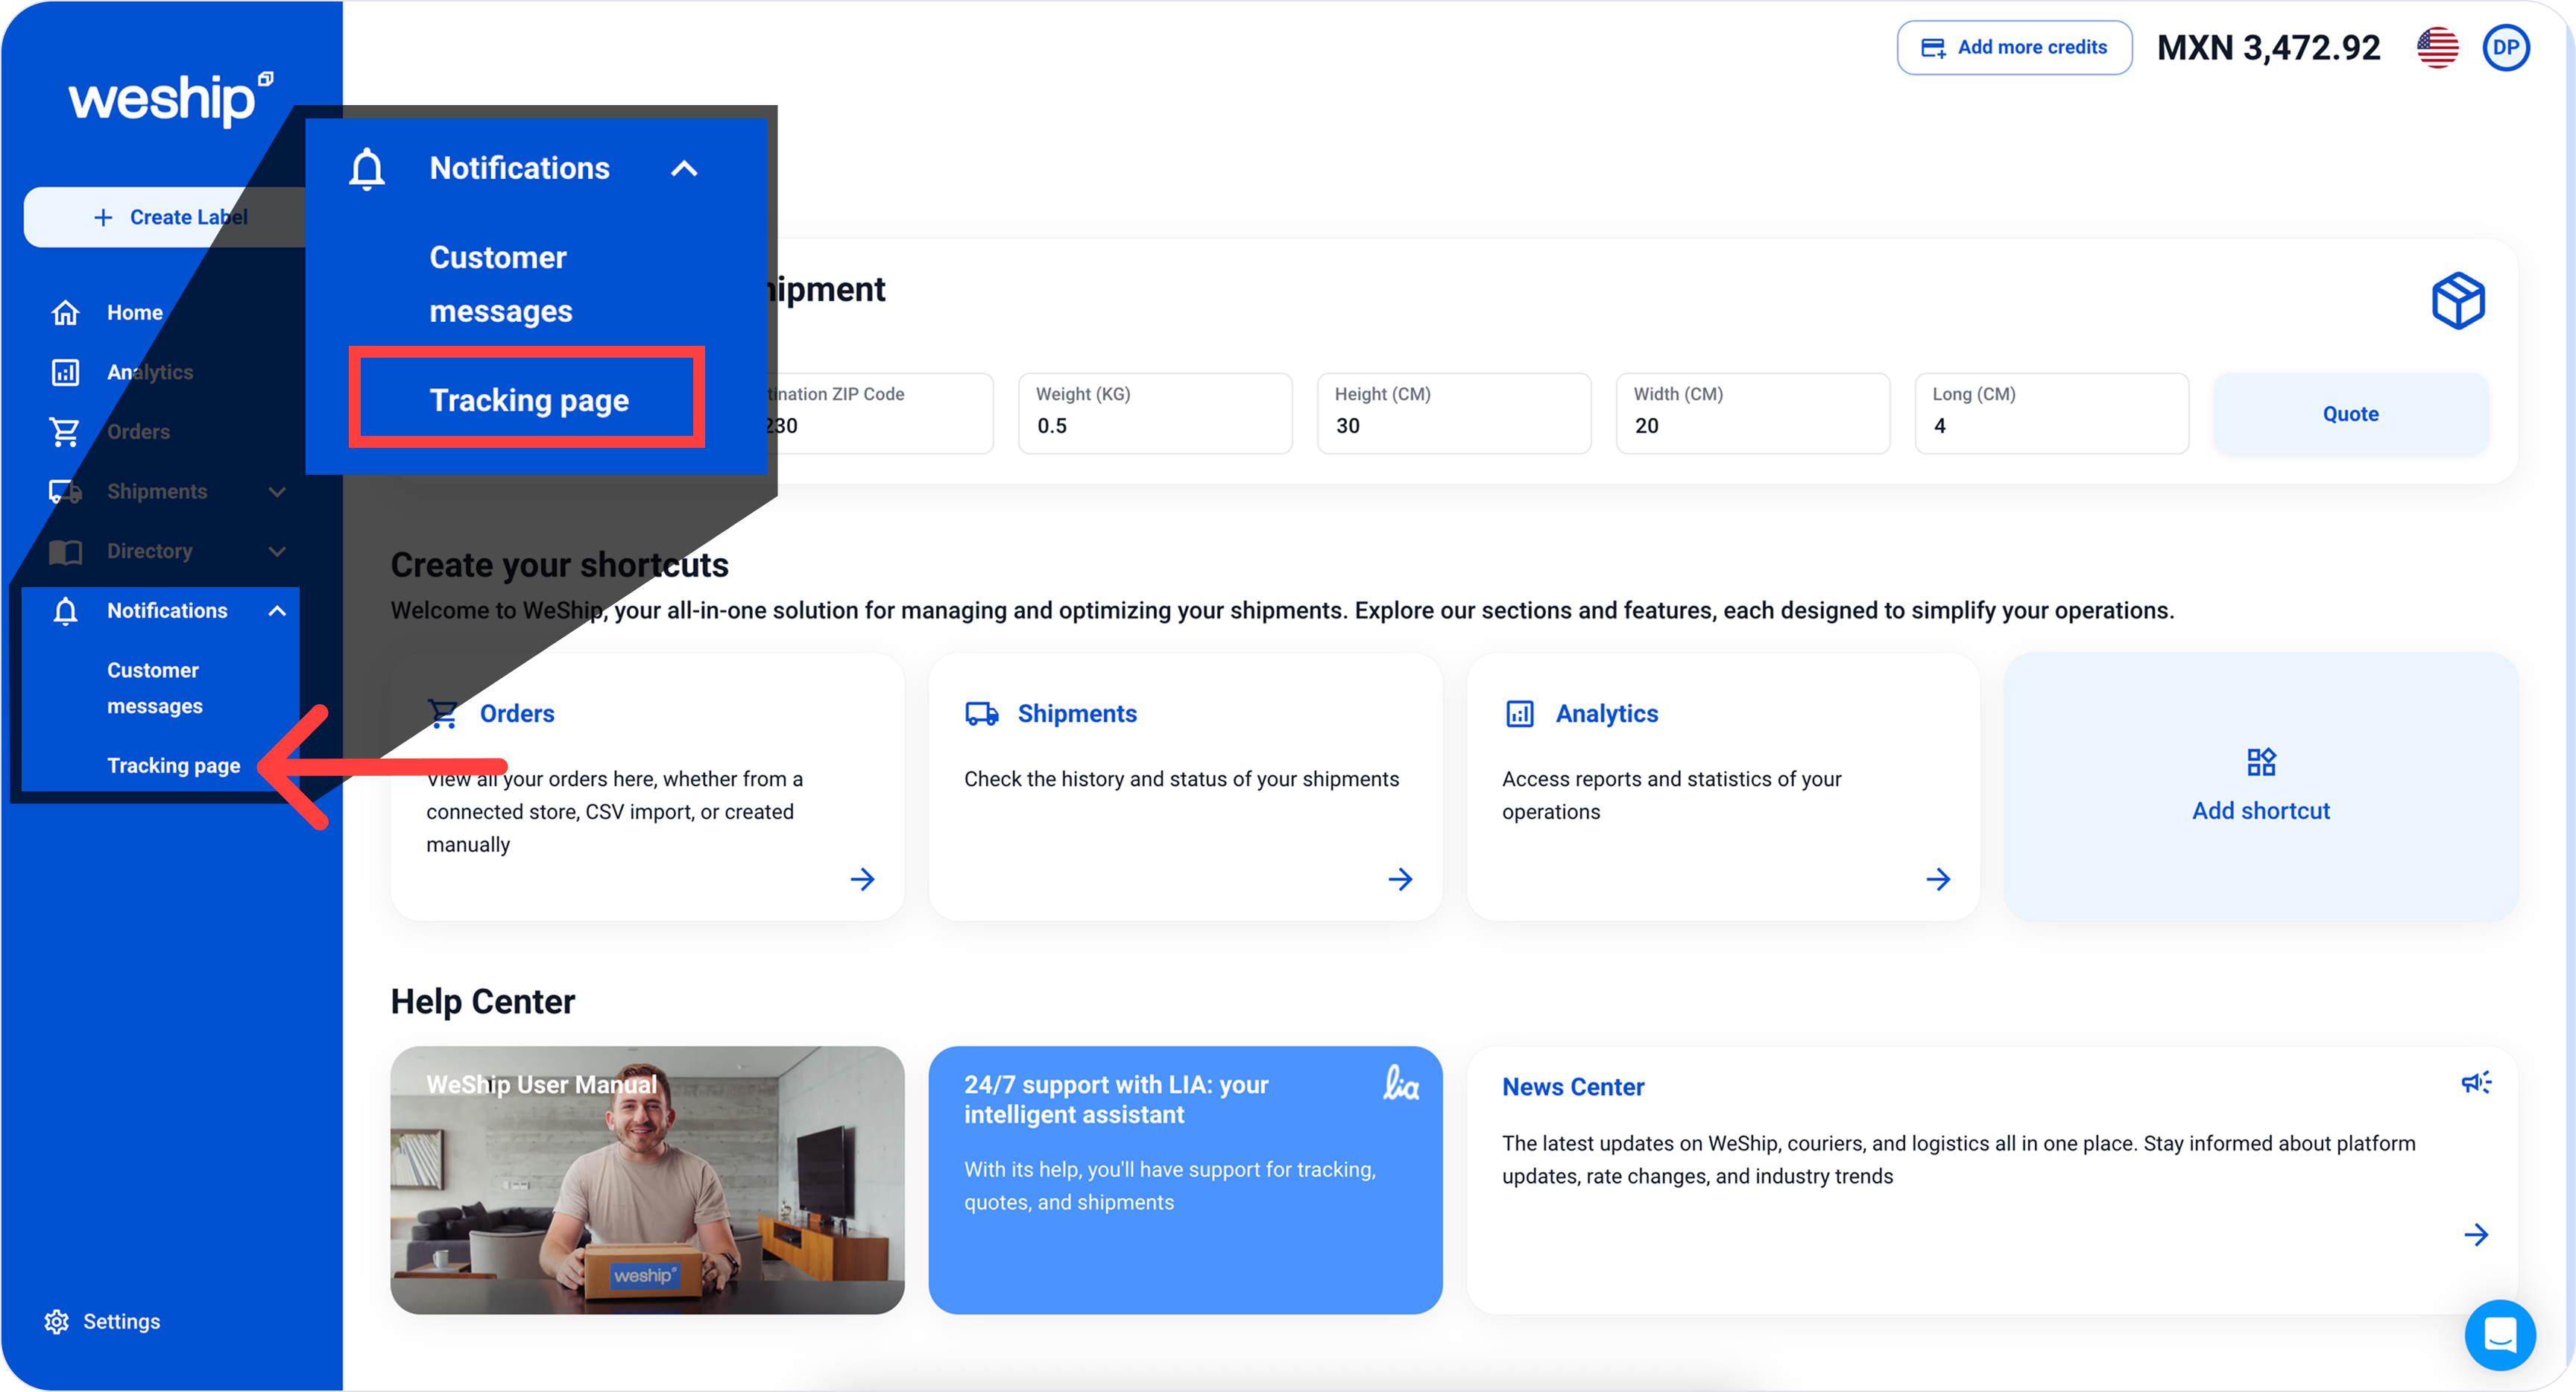
1. Go to the side menu and click on the “Notifications” tab. A sub-menu will appear—click on the option labeled “Tracking Page”
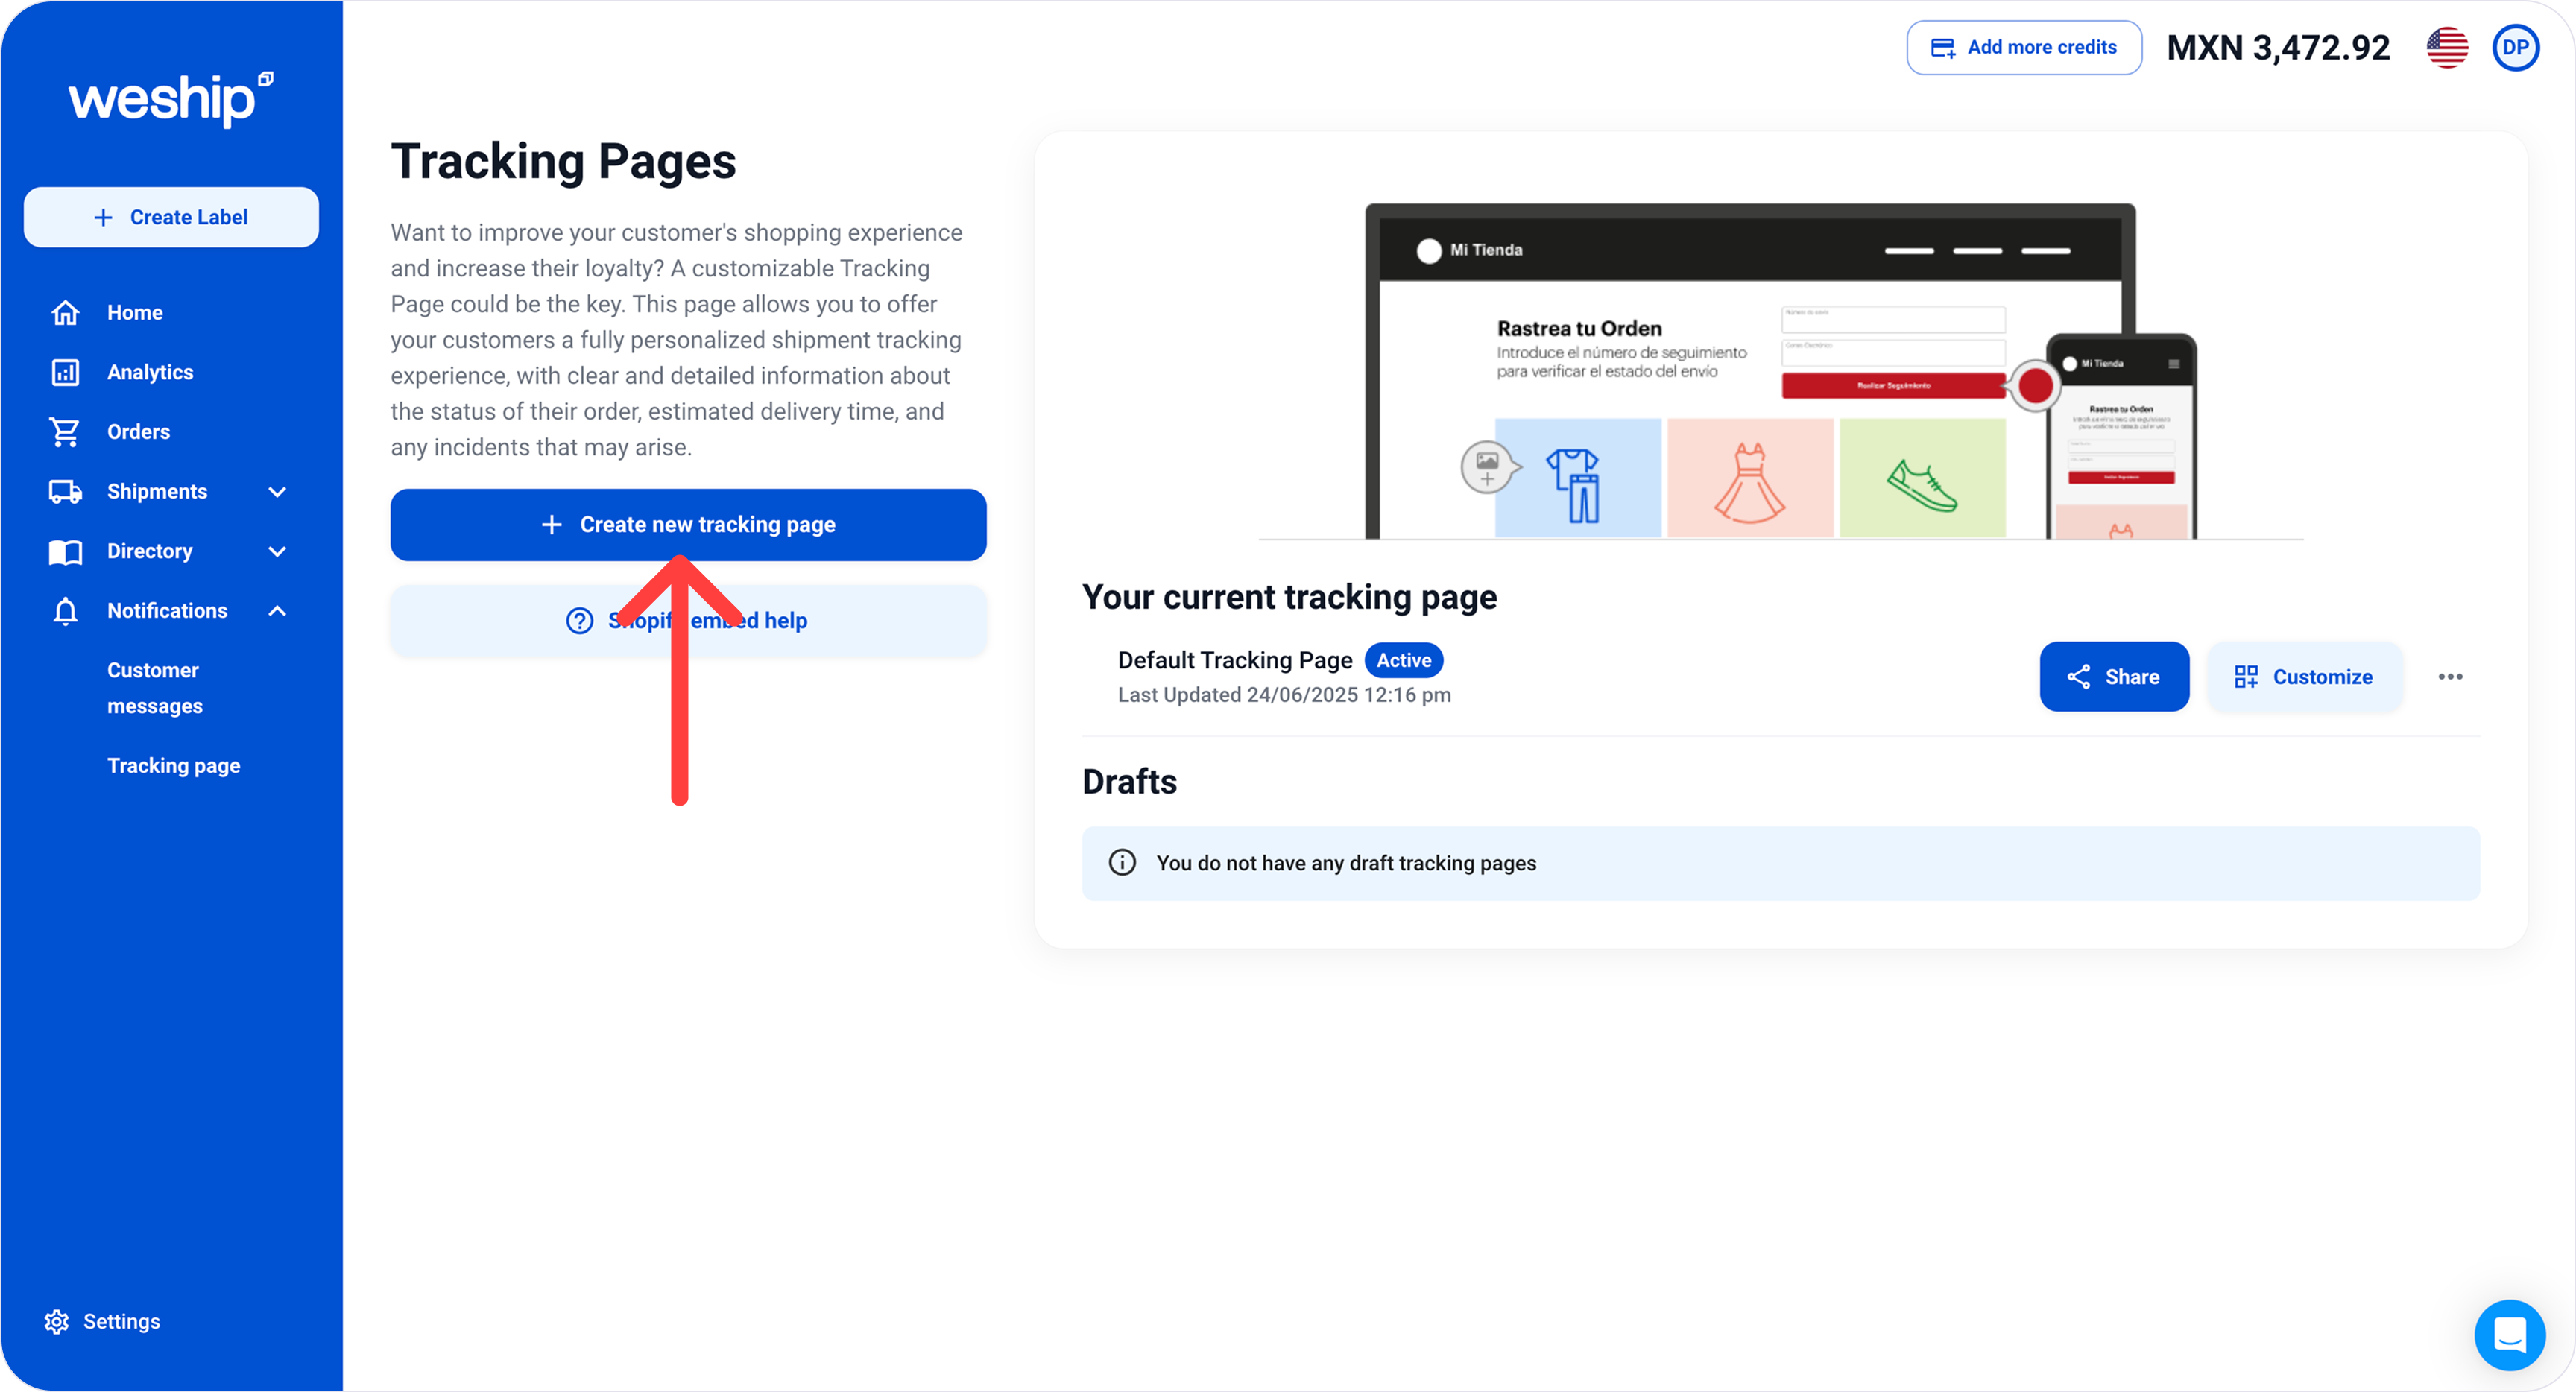
2. Click the “+ Create New Tracking Page” button.
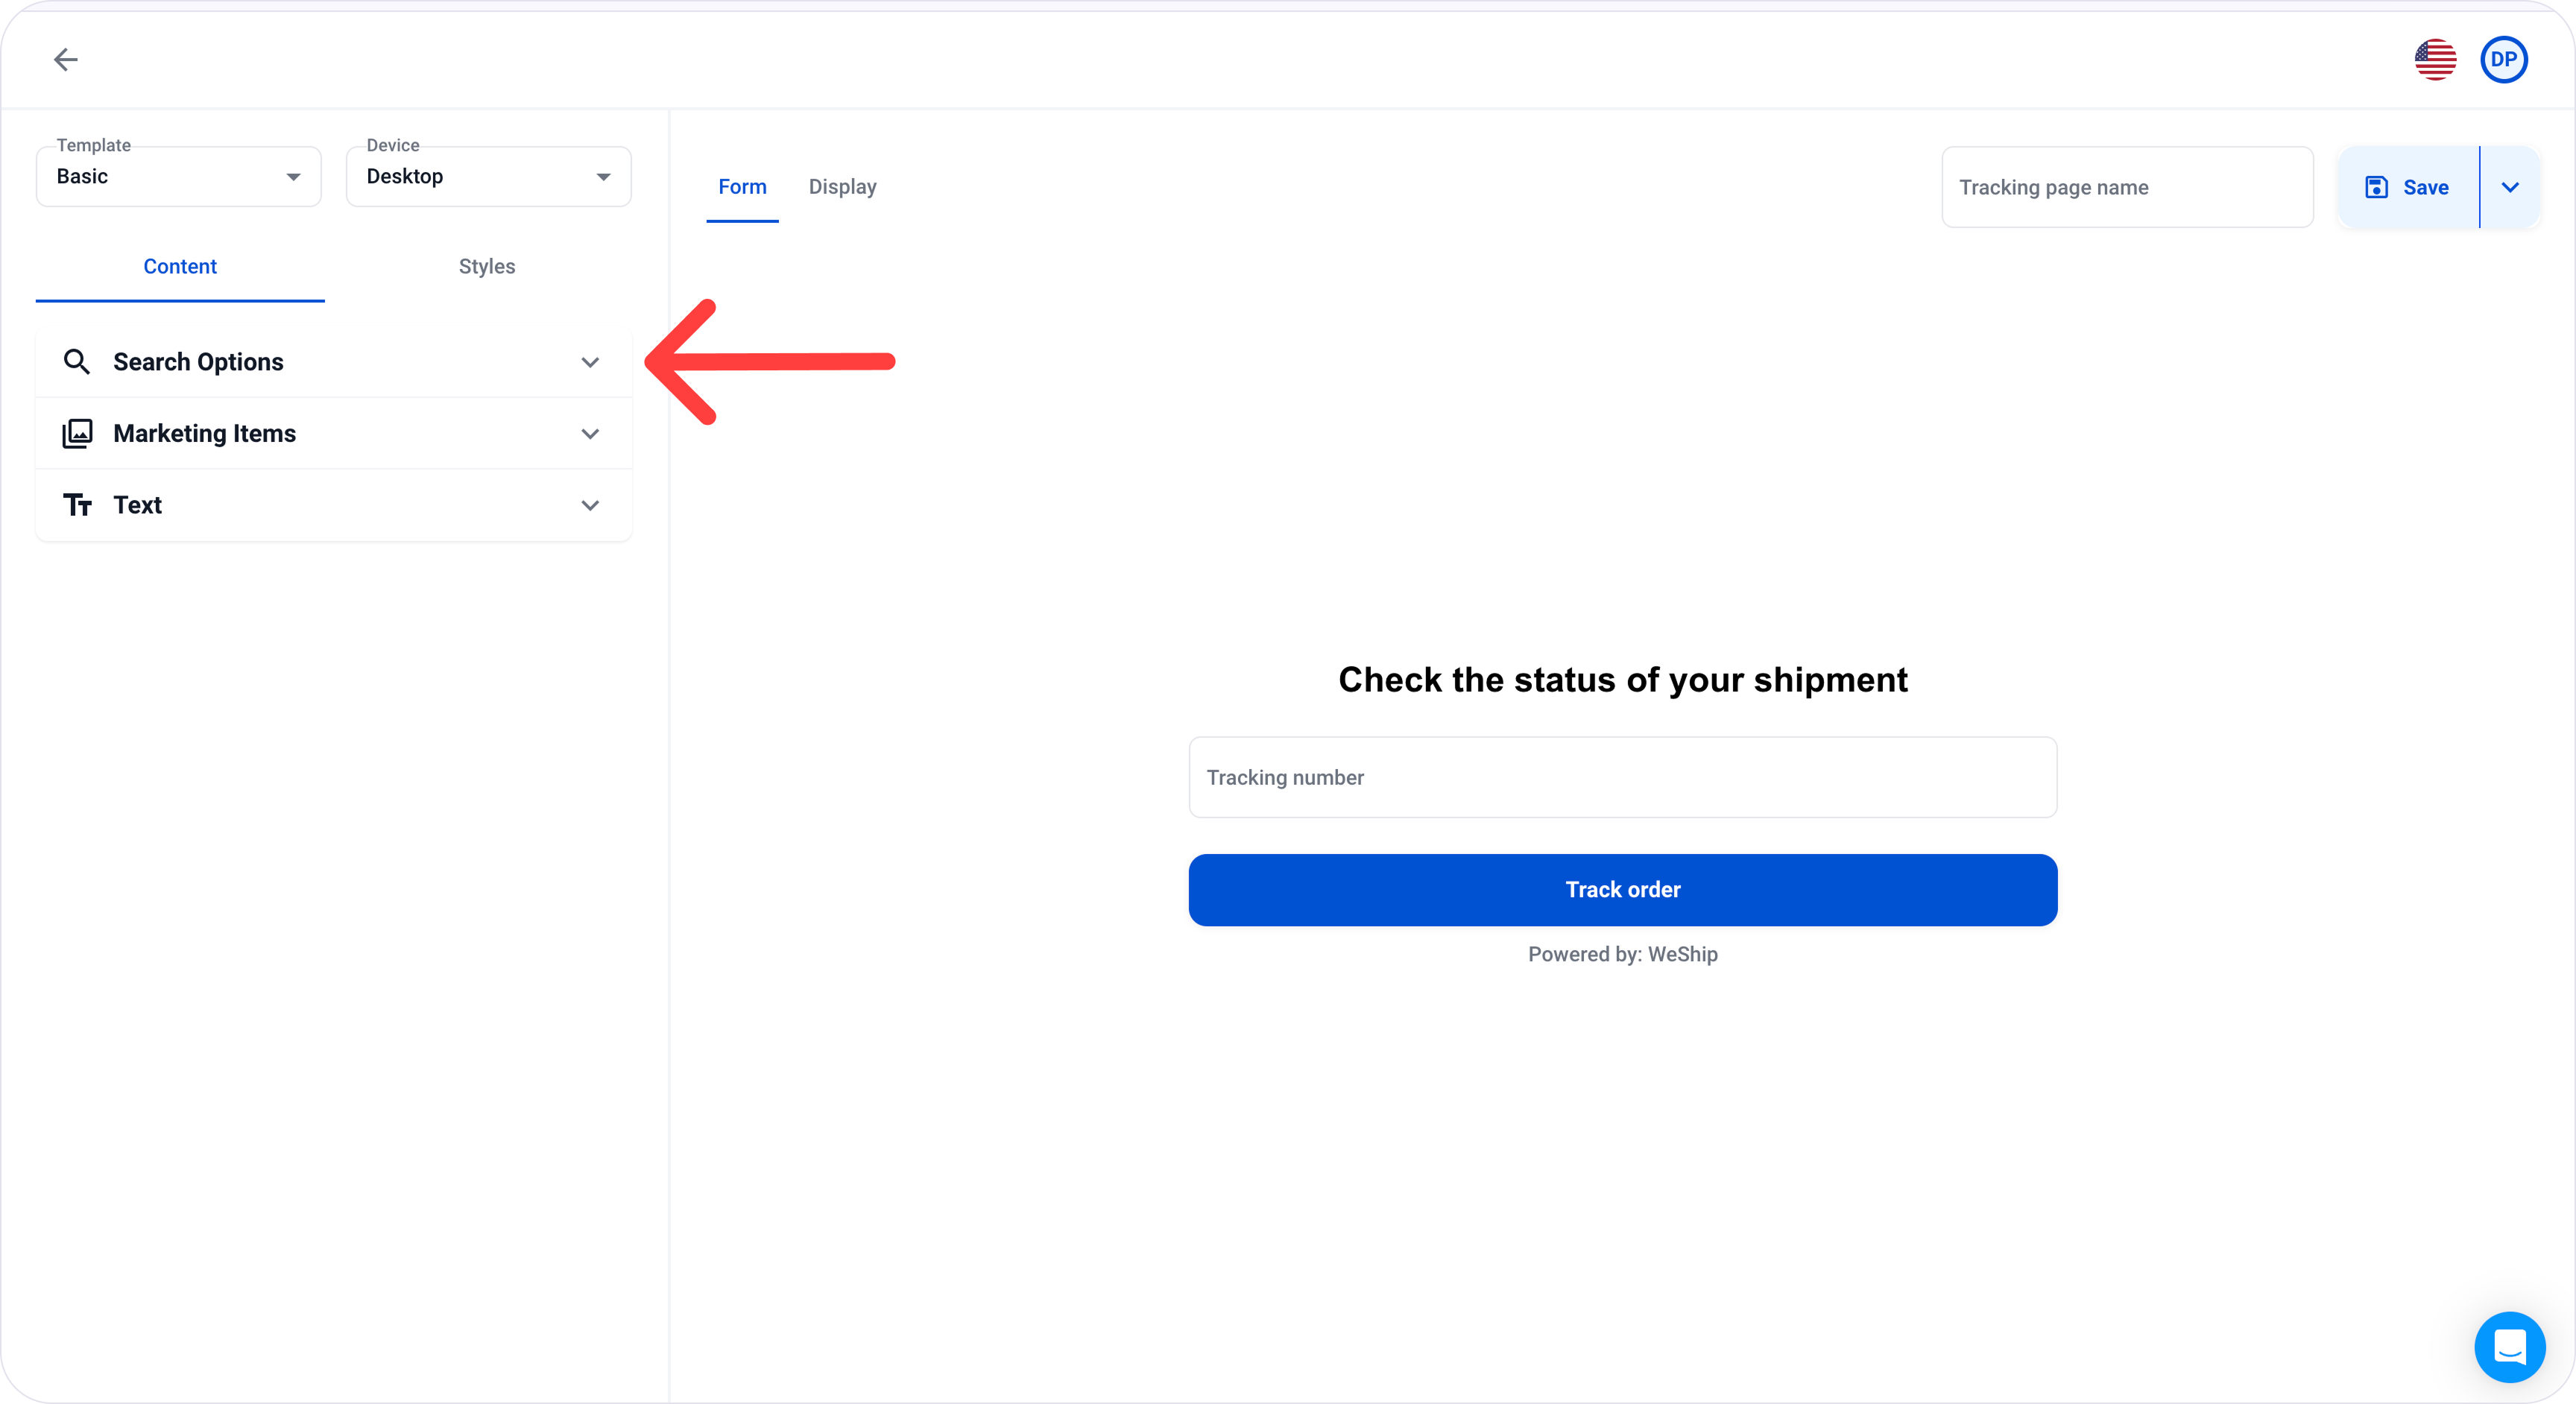
3. A builder will open where you can customize your tracking page form. Following the order, click on “Search Options”
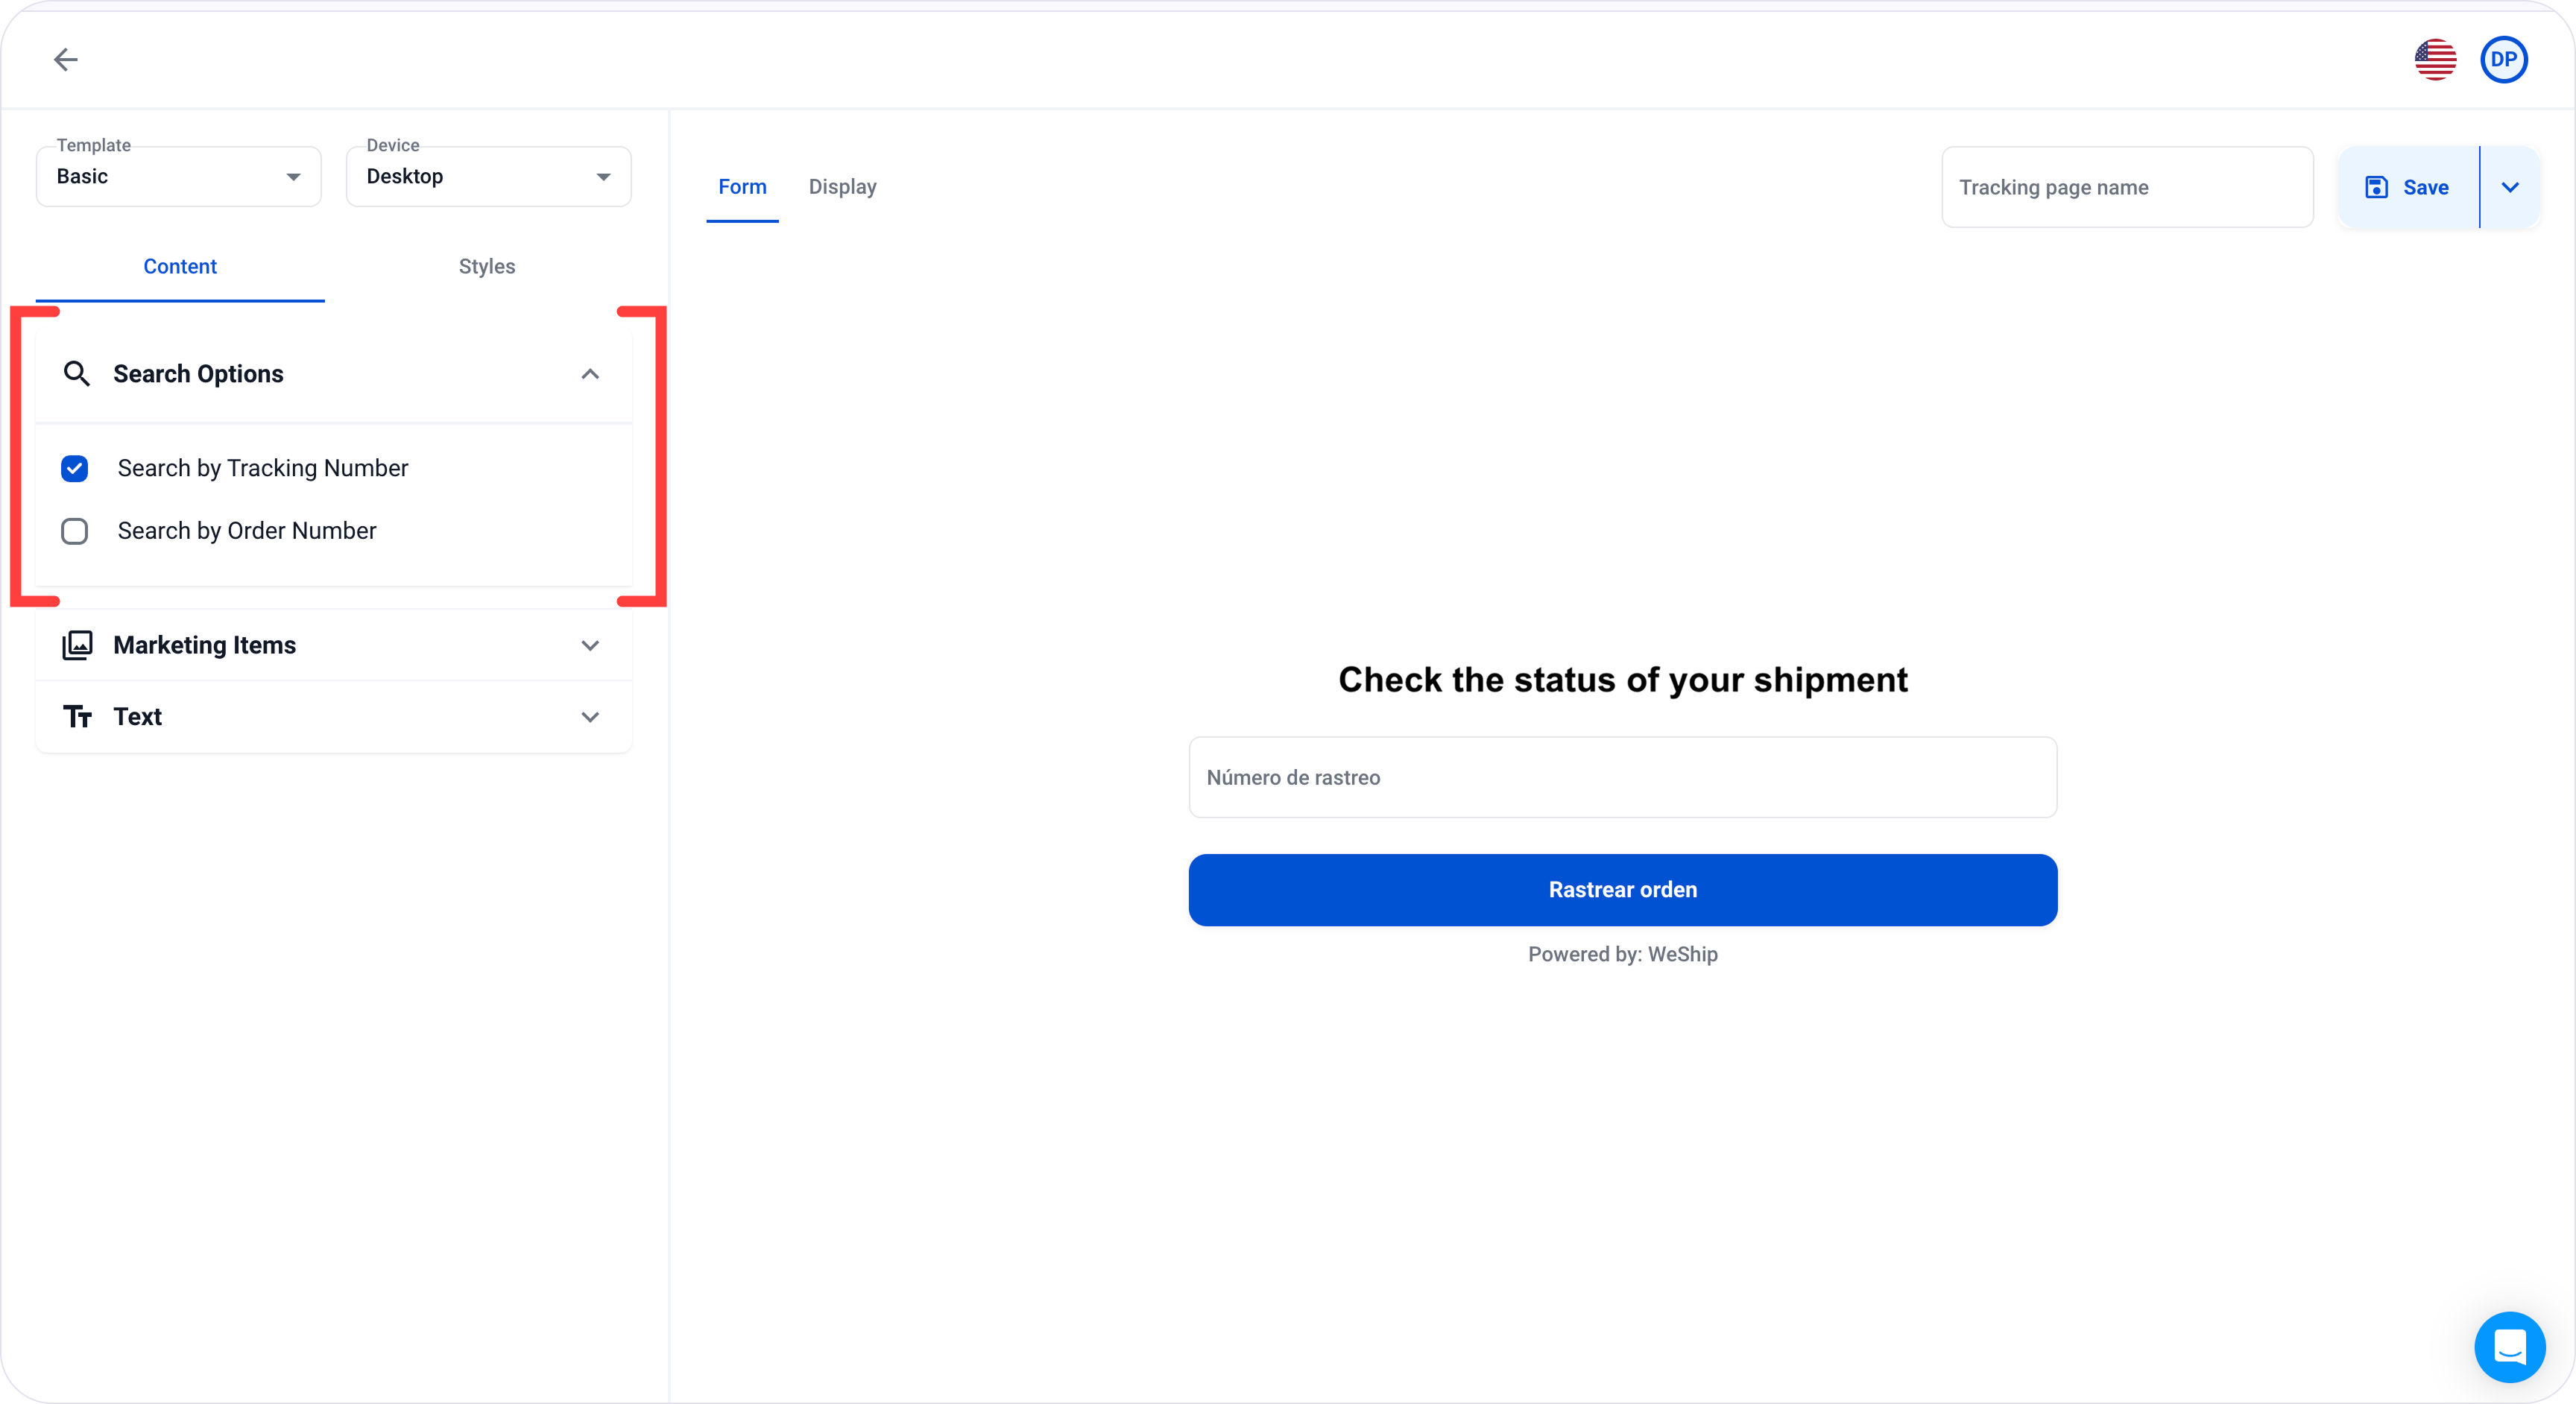
4. You can choose between “Search by Tracking Number” or “Search by Order Number” You may select either option. This will be the search method that users will use to track their order.
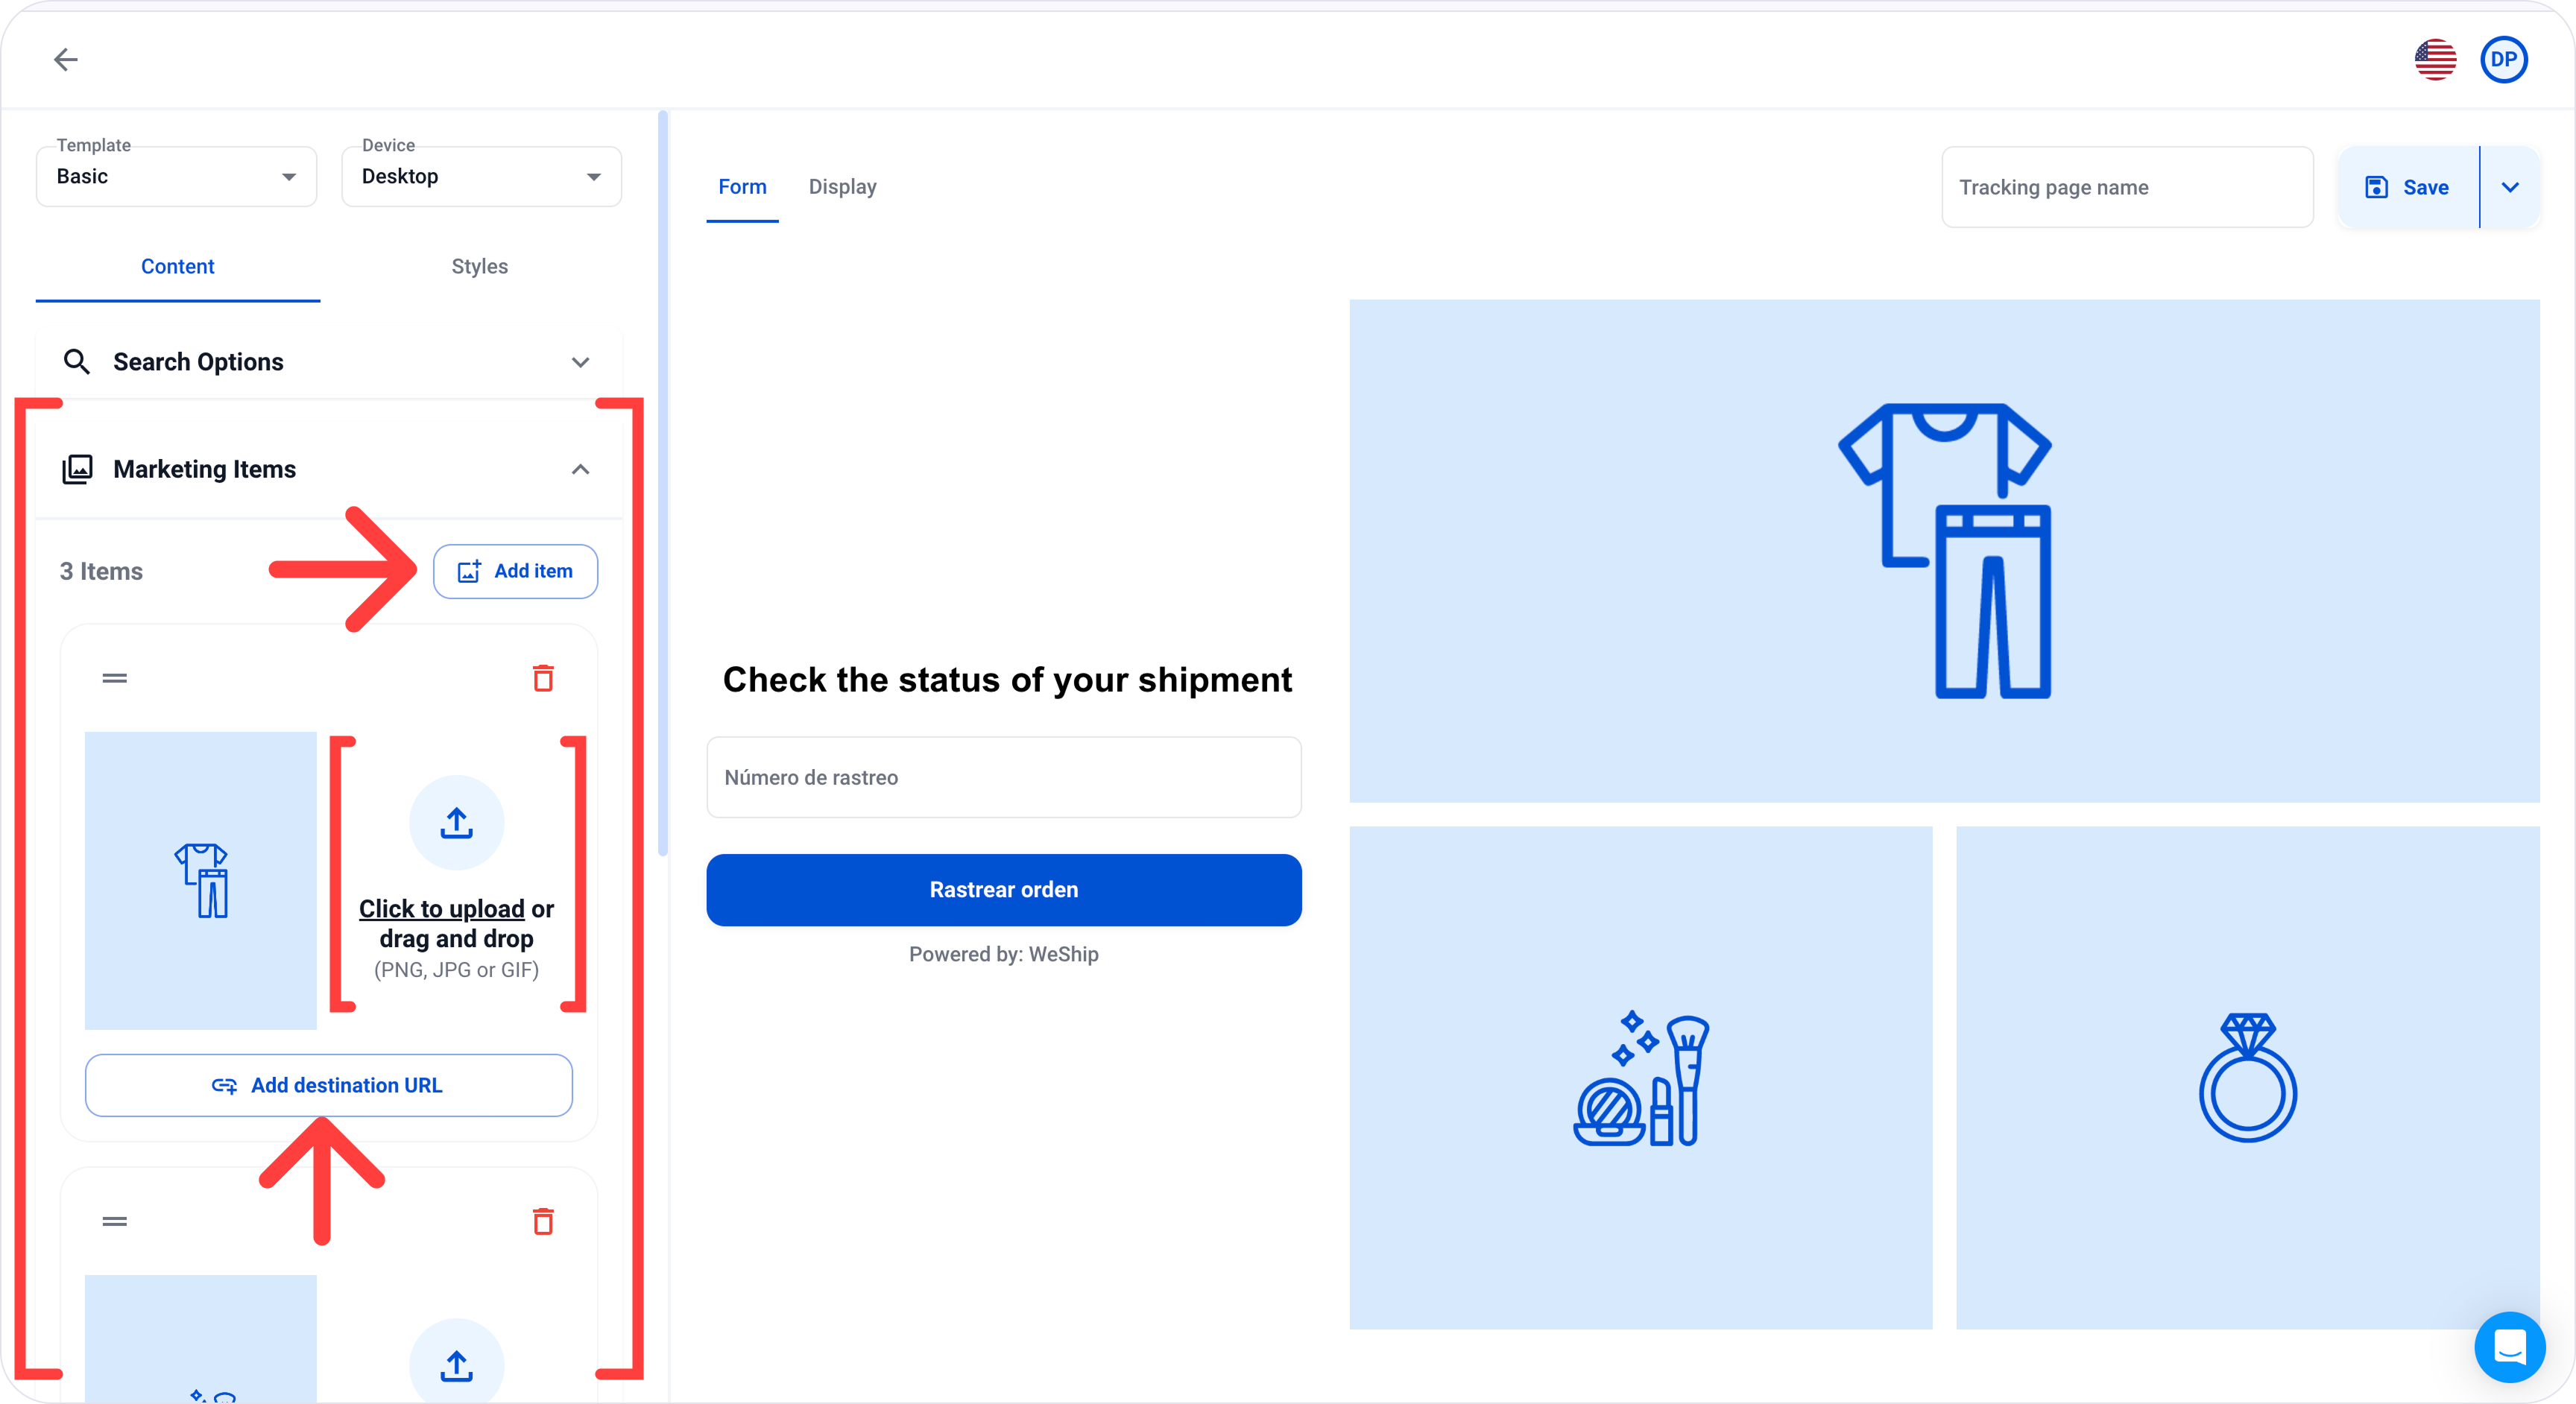
5. The next setting is “Marketing Items” where you can add images or advertising banners (PNG, JPG, or GIF) of products from your store. You can also add links to redirect users to new collections, etc. You can add up to 4 marketing items.
6. In the “Text” settings, you can edit the title message and the language of the tracking page.

7. Once those settings are configured, click on the “Styles” tab.
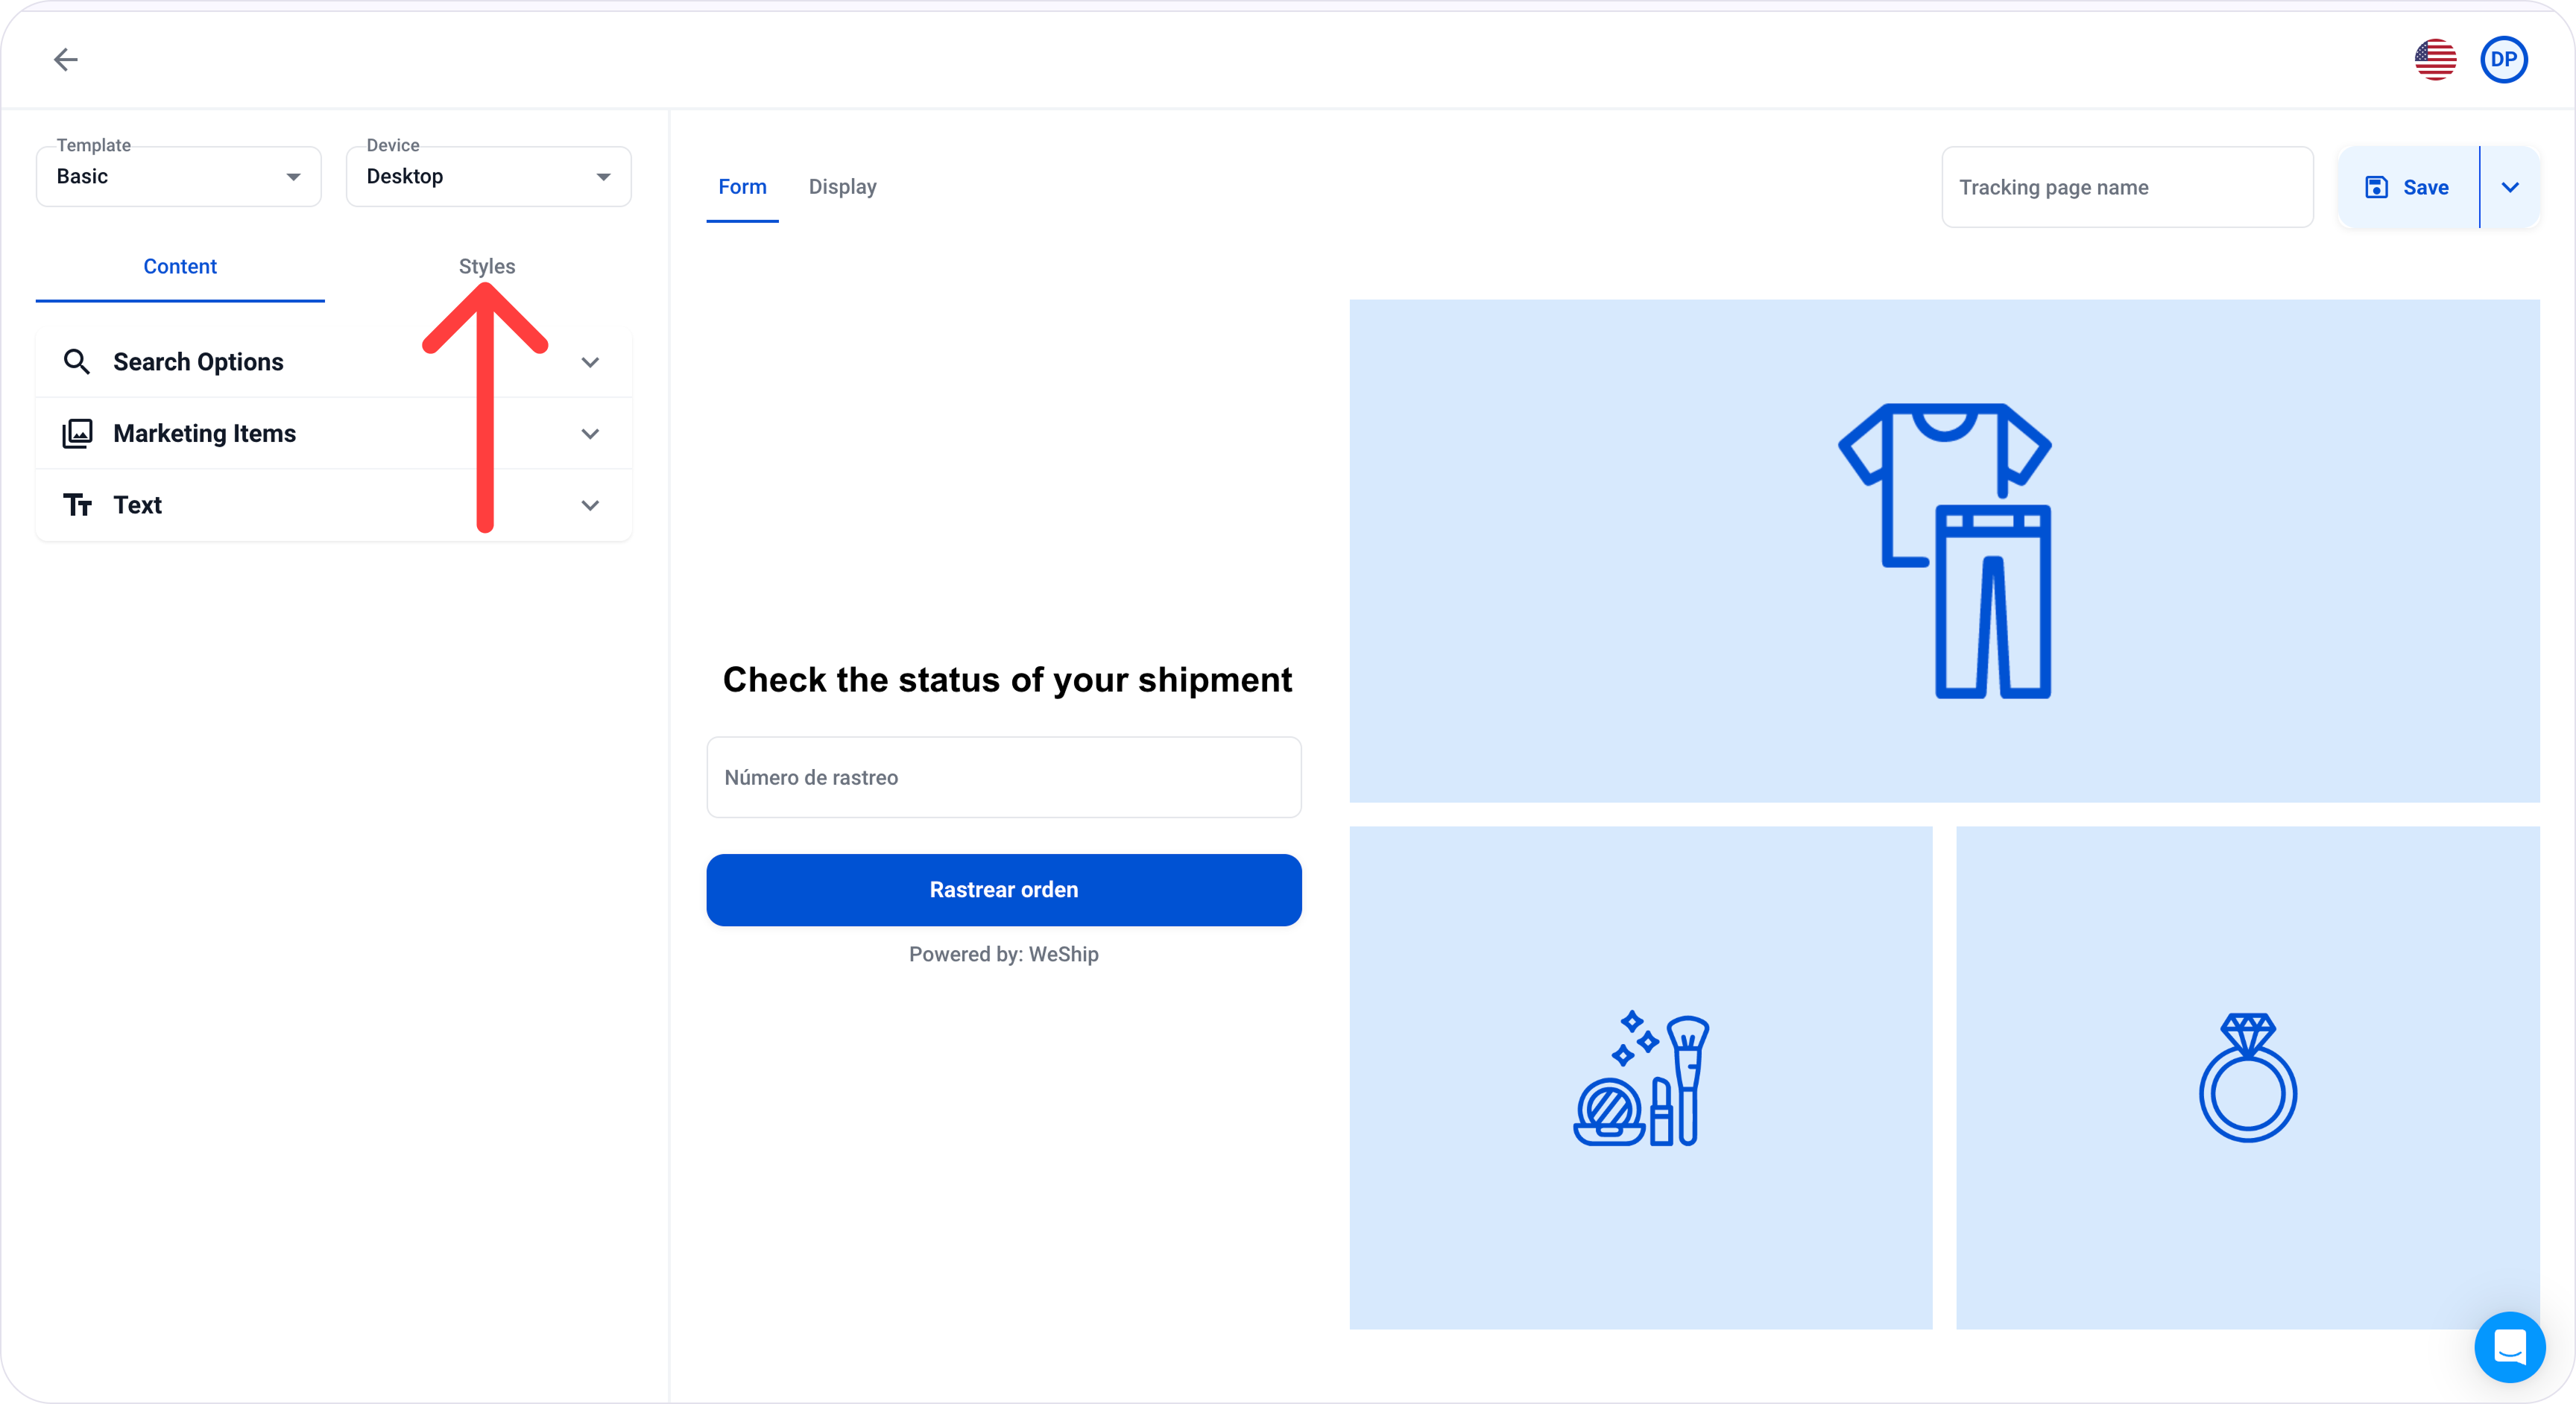
8. Here, you can customize the button and text colors to match your brand guidelines or the branding of your online store.

9. You can choose any color by clicking on the color rectangle, which will open a color picker.
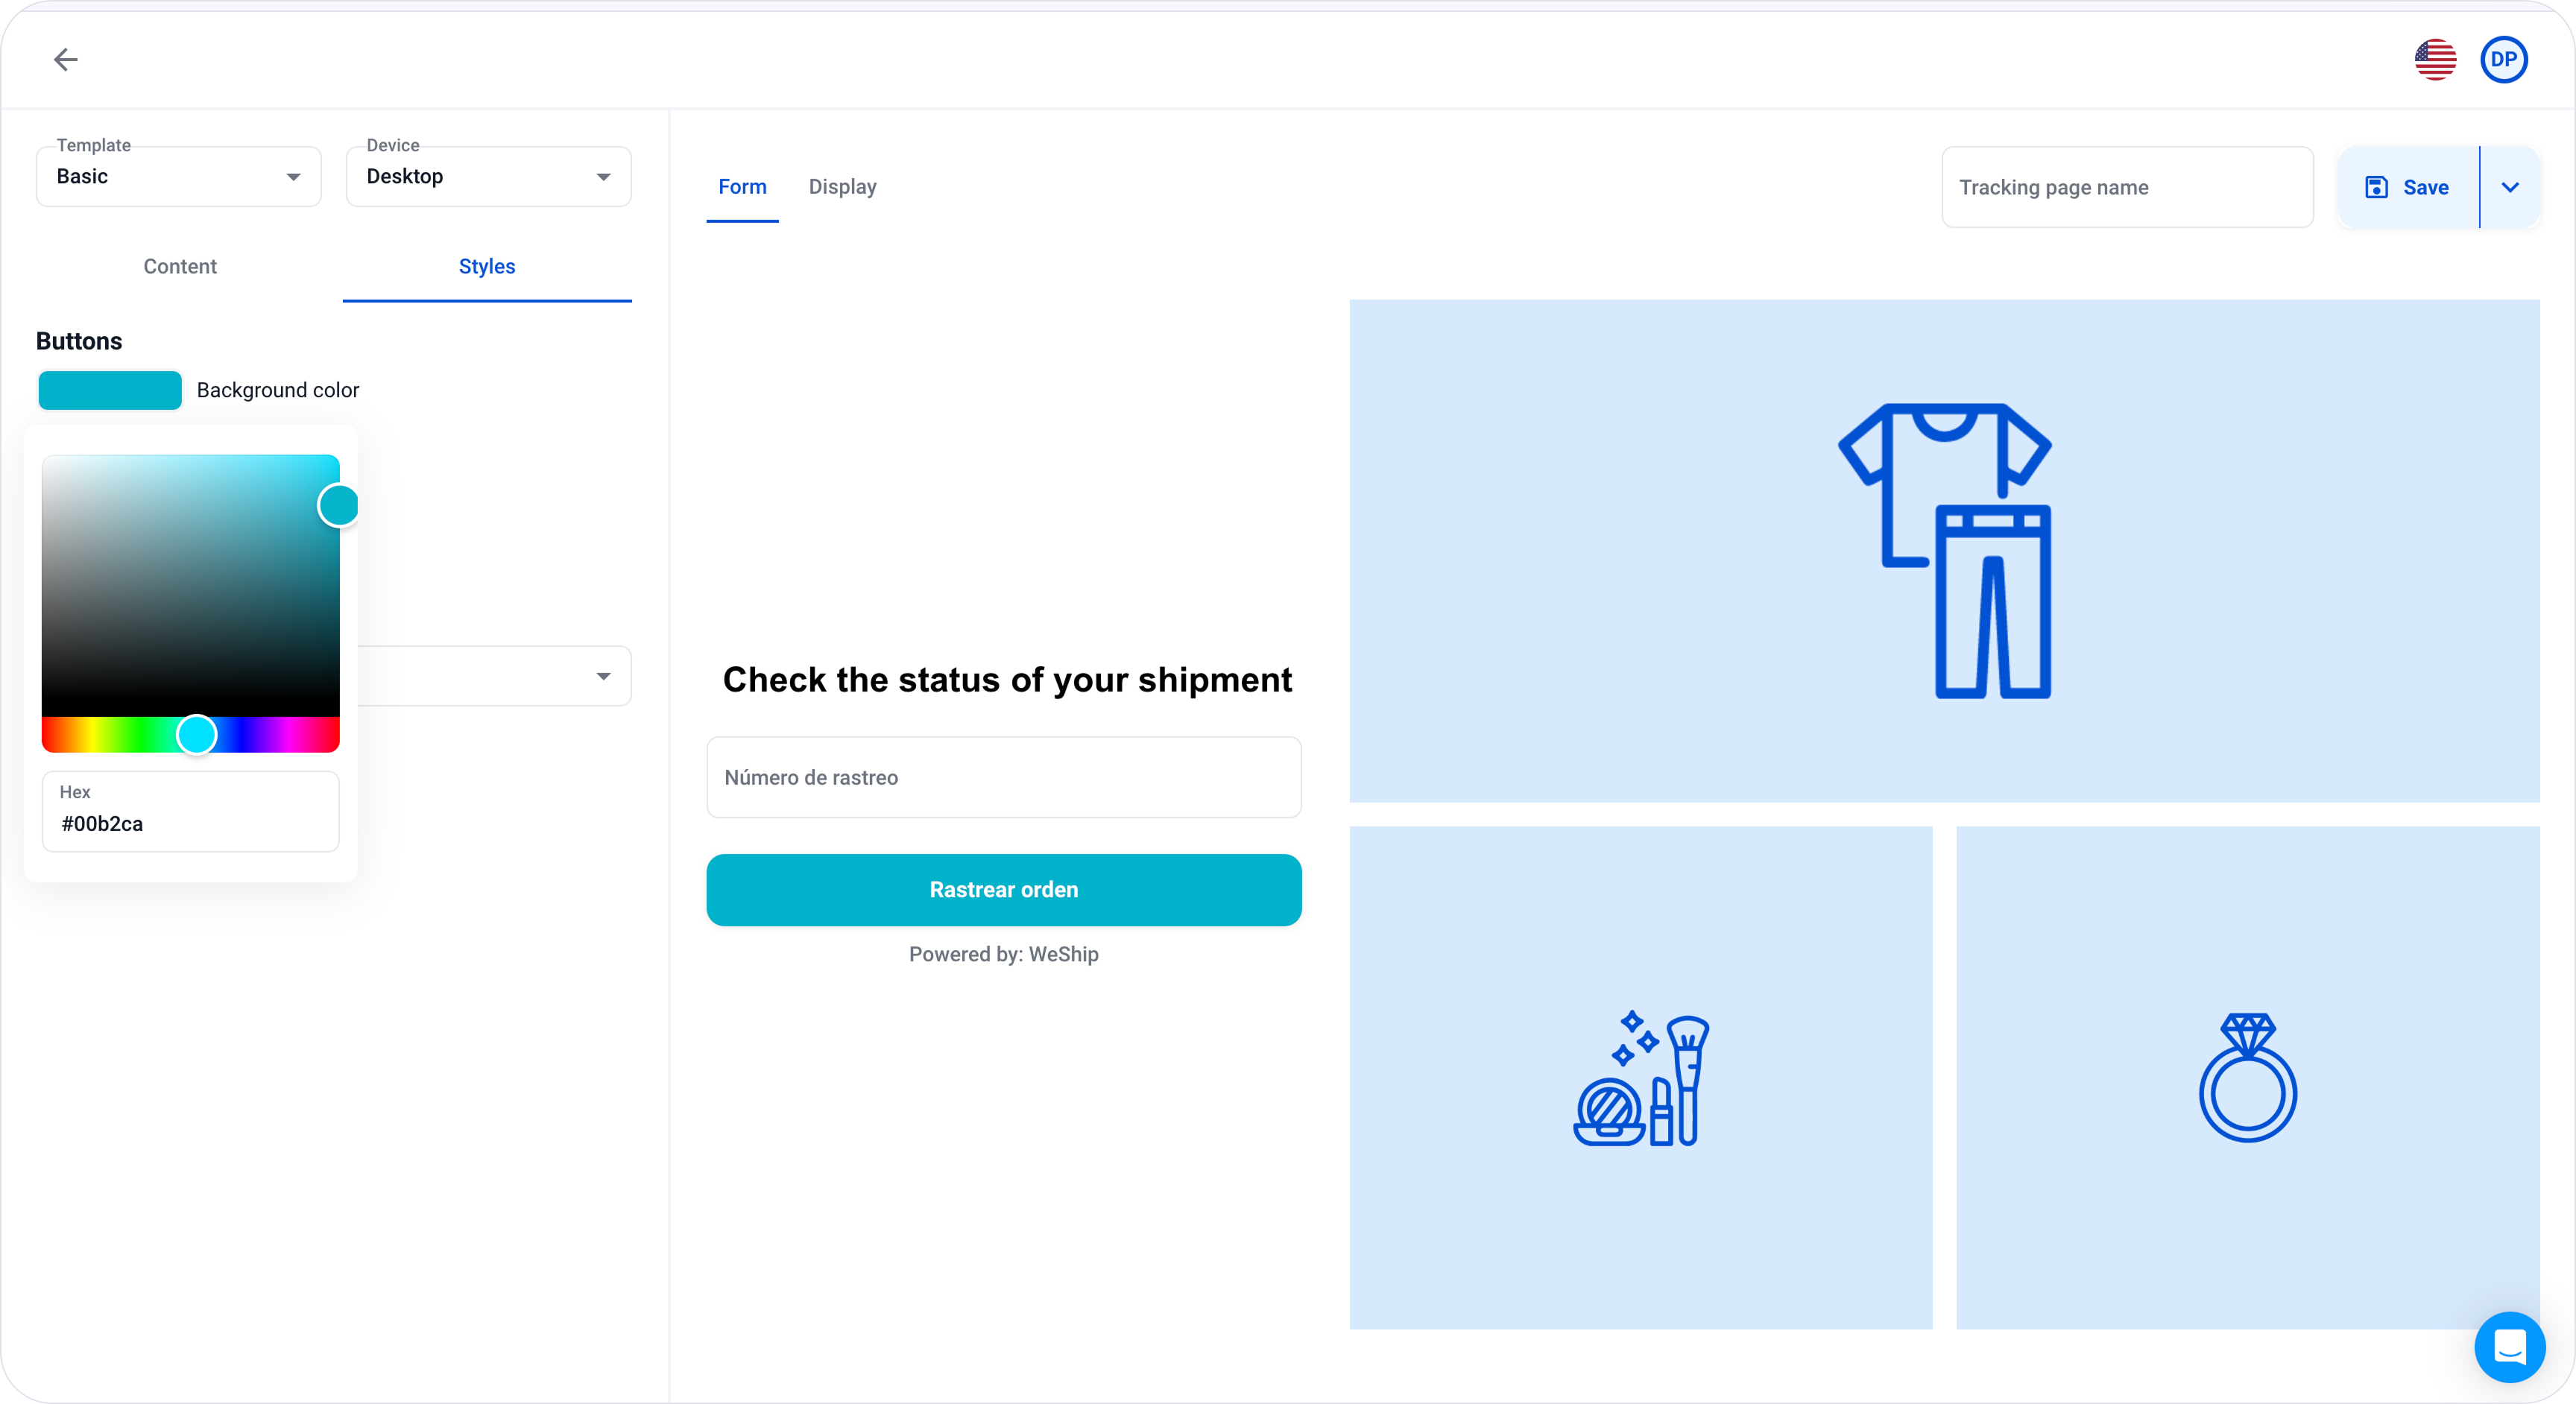
10. You can also change the font of the main message text.

11. Once you're satisfied with the form styles, click on the “Display” tab.

12. This will be the screen shown to users after they fill out the previous form. Here they will find the detailed tracking of their orders. This screen can also be customized from the “Styles” tab.
When you're happy with the customization of your tracking page, assign it a name and click the “Save” button.

13. When you return to the main “Tracking Pages” screen, you'll find your tracking page under the “Drafts” section.


